Cistern leaks are a common household problem, and will also affect the cleanliness and hygiene of the toilet. If you find that your has leaks, you can try the following methods to solve this problem:

Leaky Cistern and How to Fix it
Check if the float in the cistern is working properly
The float is part of an inlet valve that controls the water intake of the tank. When the tank is full, the float closes the water inlet to prevent more water from entering the tank.
If the float is damaged or improperly adjusted, the water level in the tank may rise above the overflow pipe, causing the toilet to run continuously. If the water level is too low, it will affect the flushing power.

To check if the float in the tank is working properly, you can follow these steps:
Open the cistern’s cover and observe the height of the float. Gently pull on the float with your hand to see if it stops the water from flowing in. If it doesn’t, you may need to replace the float.
Try adjusting the water level in the tank to an appropriate level using the inlet valve.


The images show how to adjust the water level in your tank. Tanks may have different inlet and outlet valve assemblies, but they work on similar principles.
Check if the flush valve and gasket in the cistern are working properly
The flush valve is a device that controls the water volume released when you push the flush button. It opens to let water flow out to flush the toilet, then closes again.

If the flush valve does not open/close smoothly or the rubber flapper inside is deformed, it may not close automatically and cause leaks.
You can turn the flush valve counterclockwise to remove the rubber flapper in the middle and inspect it. If damaged, purchase a replacement rubber flapper. If undamaged, use warm water and a toothbrush to clean out any sediment or hard water buildup.
The above explains the water inlet and flushing components of old-style toilets. For more details refer to this article: Cistern of Toilet 101: What You Need to Know About the 2 Different Structures

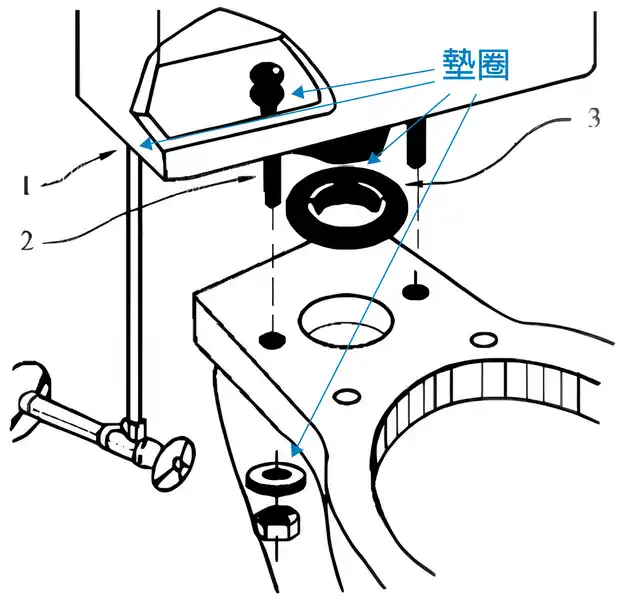
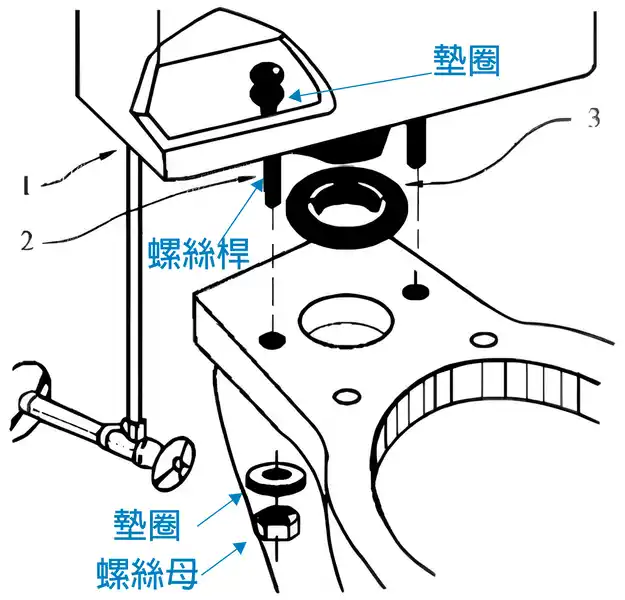
Inspect the gasket near the leak location at the bottom of the tank.
Check if the outer cistern shell is cracked or broken
If the outer shell of the tank is cracked, water will seep out from the cracks and cause the tank to leak. This situation is more serious and you should have a professional replace the tank as soon as possible.
Temporary solution for hairline cracks in the tank: If the cracks are small, you can consider using some simple methods to temporarily seal them first, then consider purchasing a new tank or contacting a professional for repair.


You can refer to the following 5 key steps to replace the cistern yourself:
1.Turn off the water supply
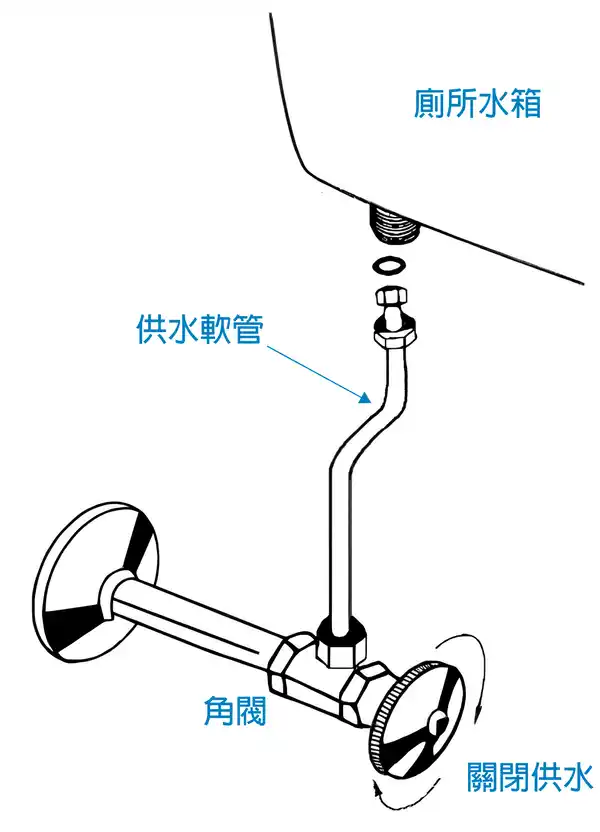
Find an angle valve near the cistern and turn it to the closed position to stop water from entering the cistern. If there is no angle valve, you need to turn off the main water valve for the whole room or floor.

2.Empty the cistern
Press the flush button to flush out all the water in the cistern, or use a manual method to scoop out the water from the cistern.

3.Remove the cistern
Use a wrench or pliers to loosen the nut at the bottom of the cistern.

Then loosen the nut that connects the riser tube to the angle valve at the bottom of the cistern, and finally separate the cistern from the toilet.

4.Clean the cistern
Use a dry cloth or paper towel to wipe off the water inside and outside the old cistern. To avoid wetting the surrounding environment.
5.Install the new cistern
Follow the instructions of the cistern and connect the new cistern to the toilet, and secure it with nuts.
Then turn the angle valve to open the water supply, and check if the cistern is leaking, and if the flush is normal.
