A leaking toilet cistern is a common but annoying problem. Not only does it affect home hygiene, it can also lead to property damage and loss if severe flooding occurs. To solve this, we first need to locate the leak and determine the cause before taking appropriate repair measures. This article introduces common causes of leaks, inspection methods and solutions.
Guide to Fixing a Leaky Toilet Cistern
Common Causes of Toilet Cistern Leaks
Toilet Cistern leaks can occur in the following parts:

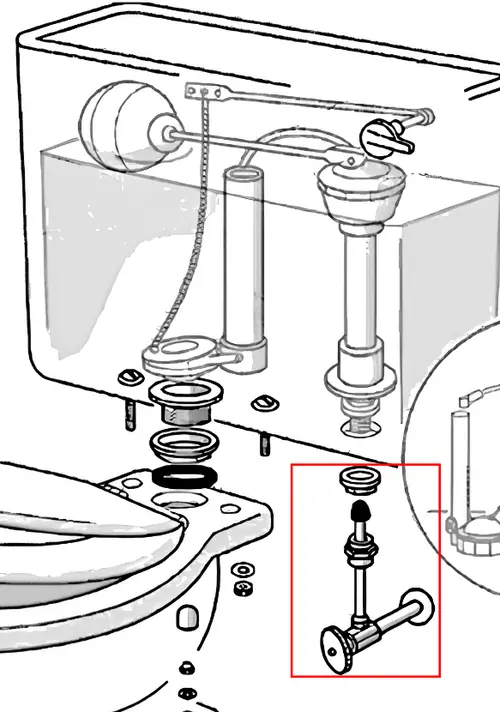
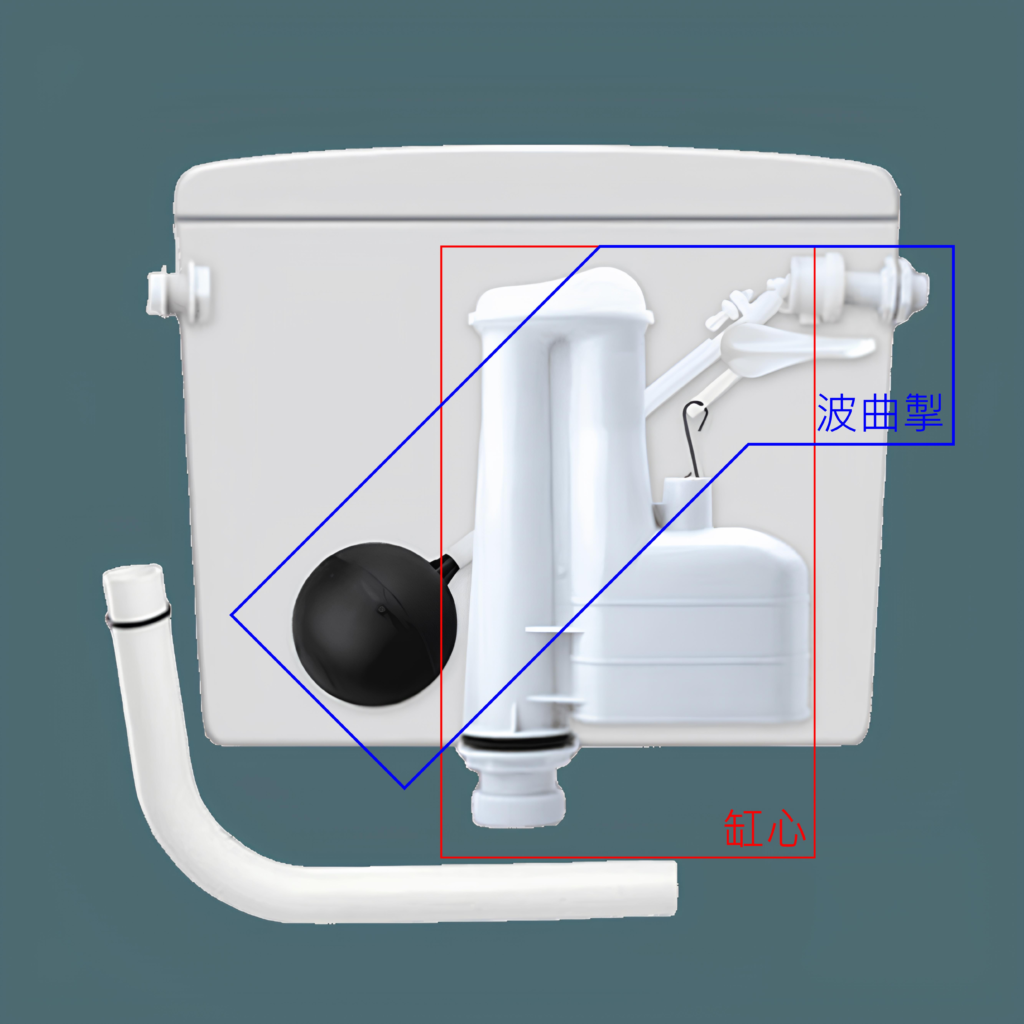
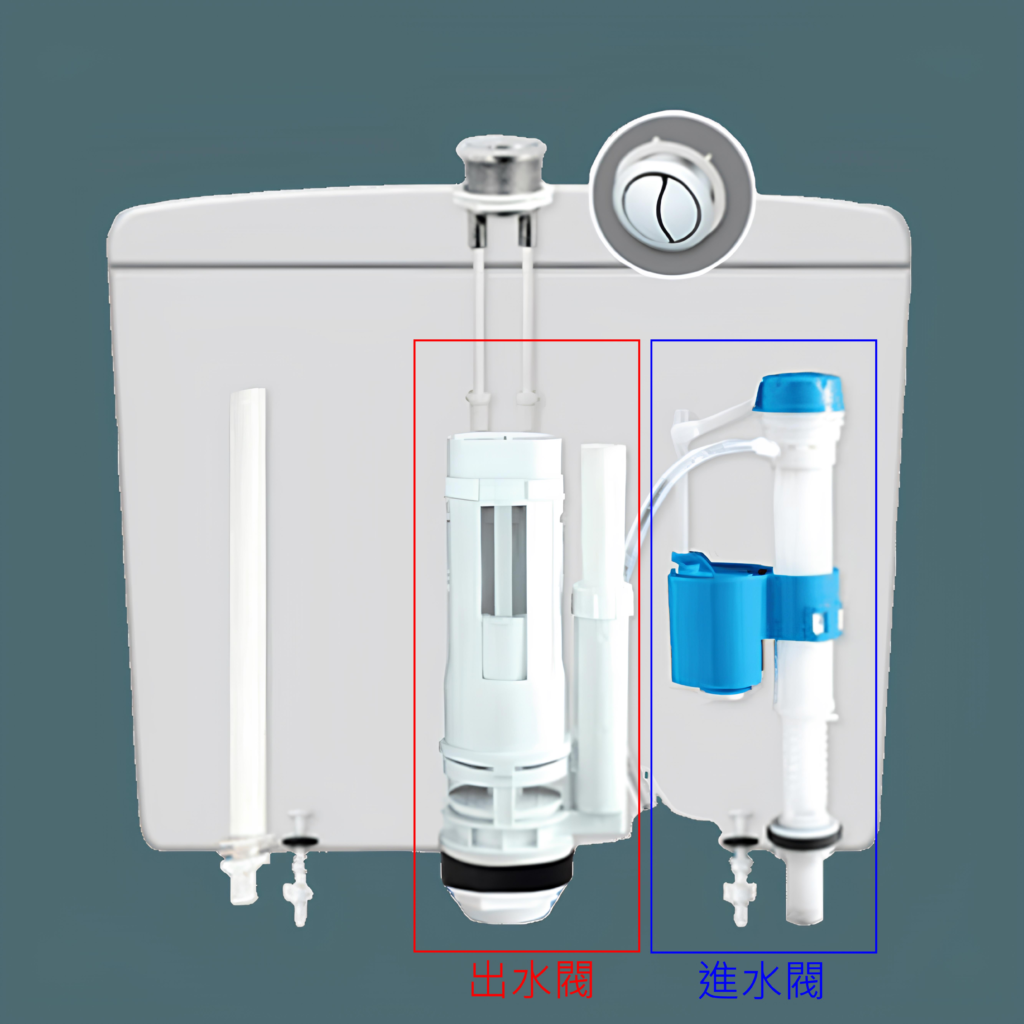
- Fill valve/Float valve: This controls the inlet valve. Damage, bending or looseness can prevent the valve from closing, causing constant water flow and leakage.

- Inlet pipe: This connects the fill valve to the tank. Cracks, wear or clogs can prevent water from entering the tank, causing leakage. You may find the tank empty or lacking water.


- Flapper valve: This controls flushing. Damage, wear or deformation of the rubber seal can prevent full closure, causing constant leakage from the bowl into the tank. You may hear flushing sounds or see discolored water.

- Outlet pipe: This connects internal and external drainage. Clogs, bends or cracks can prevent wastewater from draining, causing leaks inside or below the toilet. You may find pooling or dripping.
- Toilet body: This includes the bowl, seat, etc. Cracks, damage or improper installation can all cause leaks. Look for signs of dampness, cracks or stains.
Inspection Methods for Leaks
To locate the leak and determine the cause, use these two methods:
- Visual inspection: Open the tank cover and check for cracks, seepage or running water noises. Also inspect inside and around the bowl for dampness, dripping or pooling.
- Dye test: Add food coloring to the tank and wait 15-20 minutes. Check for traces of dye inside or outside the bowl. Dye outside the tank indicates a flapper or outlet leak.
Solutions for Leaking Toilet Cistern
Depending on the cause, try these solutions:
- Adjust or replace fill valve: Tighten or adjust the arm for proper float operation. If ineffective, replace the entire fill valve.
- Replace inlet pipe: Turn off water, detach and replace the inlet pipe. Adjust fill valve height and angle.
- Clean or replace flapper: Rinse and check for damage or deformation. If found, install a new flapper.
- Clear outlet pipe: Rinse interior and clear blockages with an auger if needed. Replace if ineffective.
- Replace damaged toilet: Determine location and extent of cracks/damage. Small cracks can be patched, while larger ones require replacing the entire toilet.
Conclusion
Tank leaks need prompt detection and repair. This article covered causes, inspection methods and solutions to help you address the issue.
Check out our toilet accessory series and toilet tank series if needed!


